Thread cutting tools
Thread cutting tools are essential tools used in machining to produce screw threads—the helical grooves commonly found on bolts, screws, and nuts. These threads can be either external (on the outside of a shaft) or internal (inside a hole), and they play a vital role in mechanical fastening and motion transfer systems.
Types of thread cutting tools
- Single-Point Tool (used on lathes for external or internal threading)
- Taps and Tap Wrenches (for cutting internal threads)
- Dies (for cutting external threads)
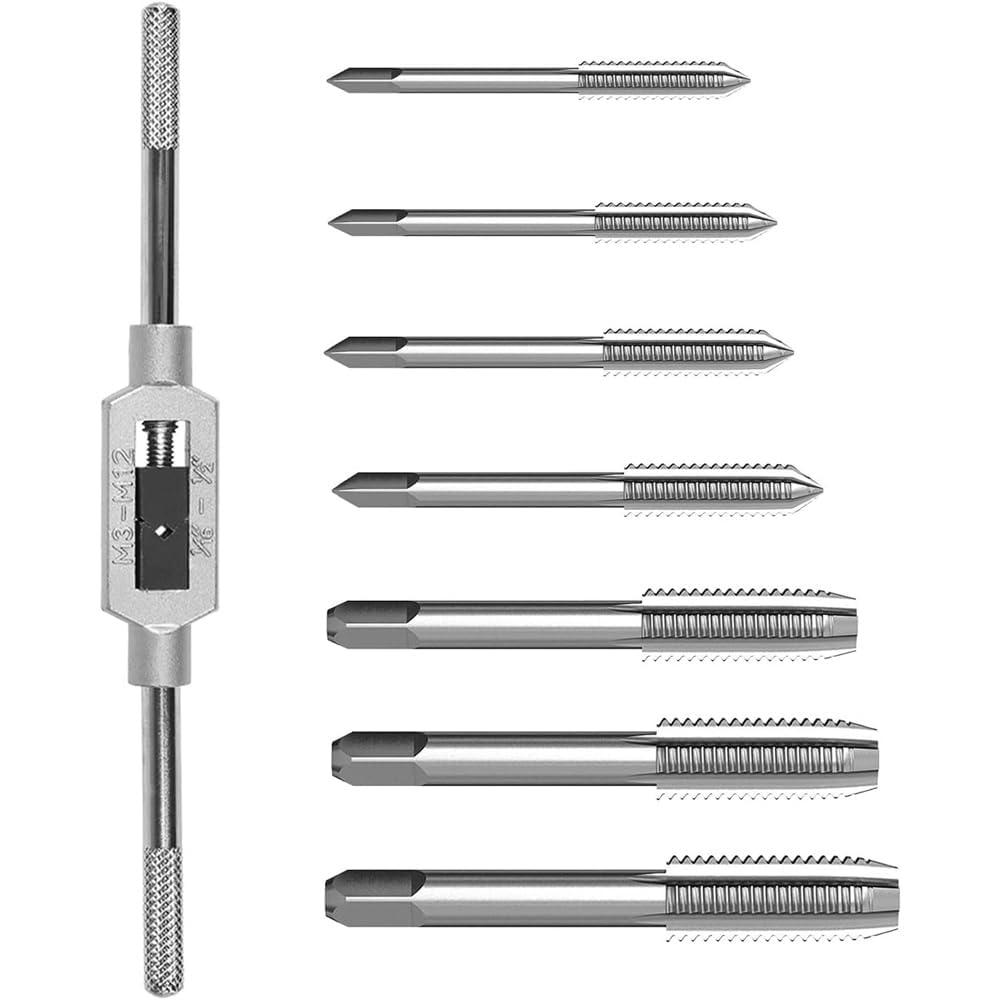
Taps and Tap Wrenches
A tap is a hardened steel tool used for cutting internal threads in a drilled hole. Hand taps are usually supplied in sets of three for each diameter and thread size. Each set consists of a taper tap, an intermediate tap, and a bottoming tap.
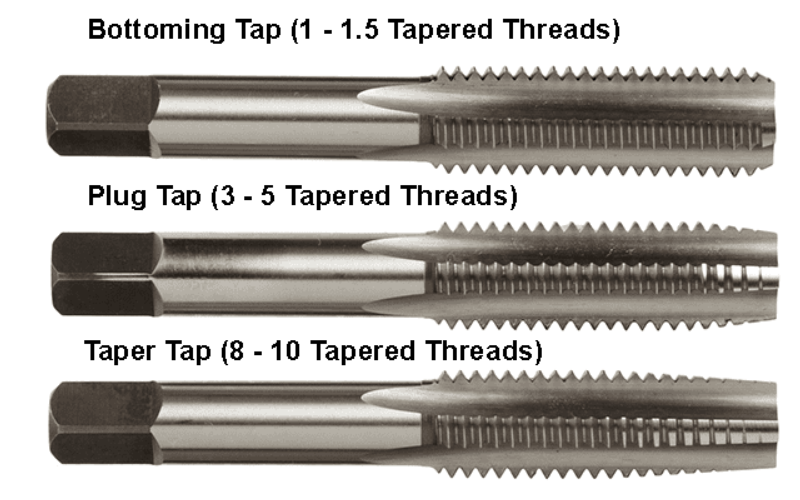
Taper Tap
- Has a long chamfered tip (8 to 10 tapered threads).
- Cut the thread gently at the start.
- Easy to align and start threading.
Intermediate Tap or Plug Tap
- Medium chamfer (3 to 5 threads).
- Continue the threading after the taper tap.
- Removes more material to form deeper threads.
Bottoming Tap
- Very short chamfer (1 to 1.5 threads).
- Cuts threads nearly to the bottom of the hole.
- Has full thread form almost to the tip.
Driving Taps with a Tap Wrench in Hand Tapping
In hand tapping, taps are used to cut internal threads inside pre-drilled holes. The taps have a square-shaped end (called a shank) designed to be securely gripped and rotated using a tap wrench.

Steps for generation of internal threads
Step 1: Selection of correct size tap
Select the correct size tap, with the desired pitch.
Step 2: Selection of correct size tap drills
Select the correct size tap drill, usually indicated on the tap.
Step 3: Drilling of hole
Drill the required diameter hole.
Step 4: Securing of tap in the wrench
Secure the tap in the tap wrench.
Step 5: Insertion of taper tap
Insert the first or taper tap in the hole and start turning clockwise by applying downward pressure.
Step 6: Checking of tap alignment with try square
Check the alignment of the tap with a try square and correct it if necessary by applying sidewise pressure while turning the tap.
Step 7: Insertion of intermediate and bottoming taps
Turn the tap forward about half a turn and then back until chips break loose.
Repeat the process until threading is completed with intermediate and bottoming taps.
Step 8: Removal of tapping tools
Remove the tap carefully. If it gets stuck, work it back and forth gently to loosen it.
Clean the workpiece and the tapping tools after the generation of threads.