ESP 32 Programming
Duration: 1 Hr
Training Points: 100 Pts.
Facility to Book: Workstation
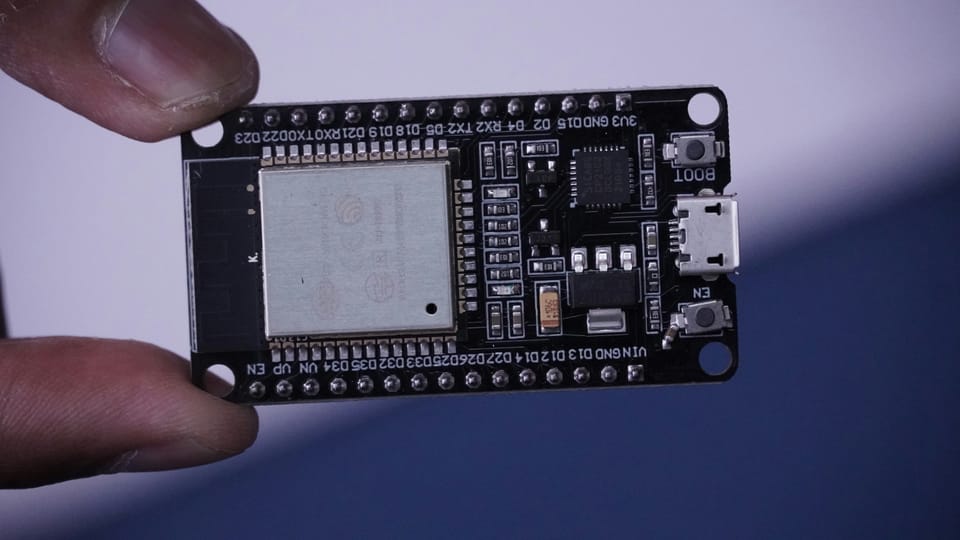
The ESP32 is a low-cost, low-power microcontroller with built-in Wi-Fi and Bluetooth capabilities. It is widely used in prototyping for IoT, automation, and wearable projects due to its powerful dual-core processor, multiple GPIO pins. The ESP we will be using is DF Robot Firebeetle 2 ESP32 C6
More on DF Robot Firebeetle ESP
Setting Up ESP32
Step 1. Installing Arduino IDE
Step 2. Installing the ESP32 Board in Arduino IDE
Blinking an LED with ESP32
Materials Required
- Firebeetle 2 ESP32-C6
- LED
- 220 ohm resistor
- breadboard
- Jumper Wires
- Micro-USB cable
Note : You can safely power the ESP32 by connecting it to your laptop using a Micro-USB cable. This is ideal for basic tasks like blinking LEDs or reading sensors. However, avoid using USB power for high-power components like motors or relays, as the laptop USB port provides limited current (usually up to 500mA).
Step 1. Making Wired Connections
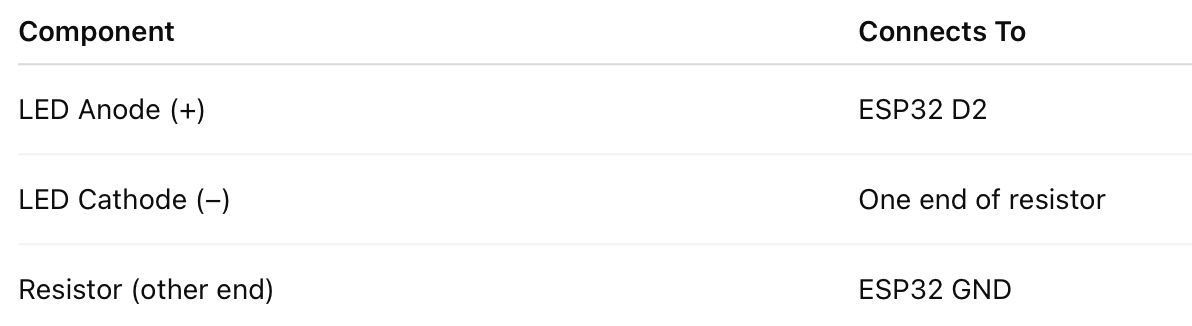
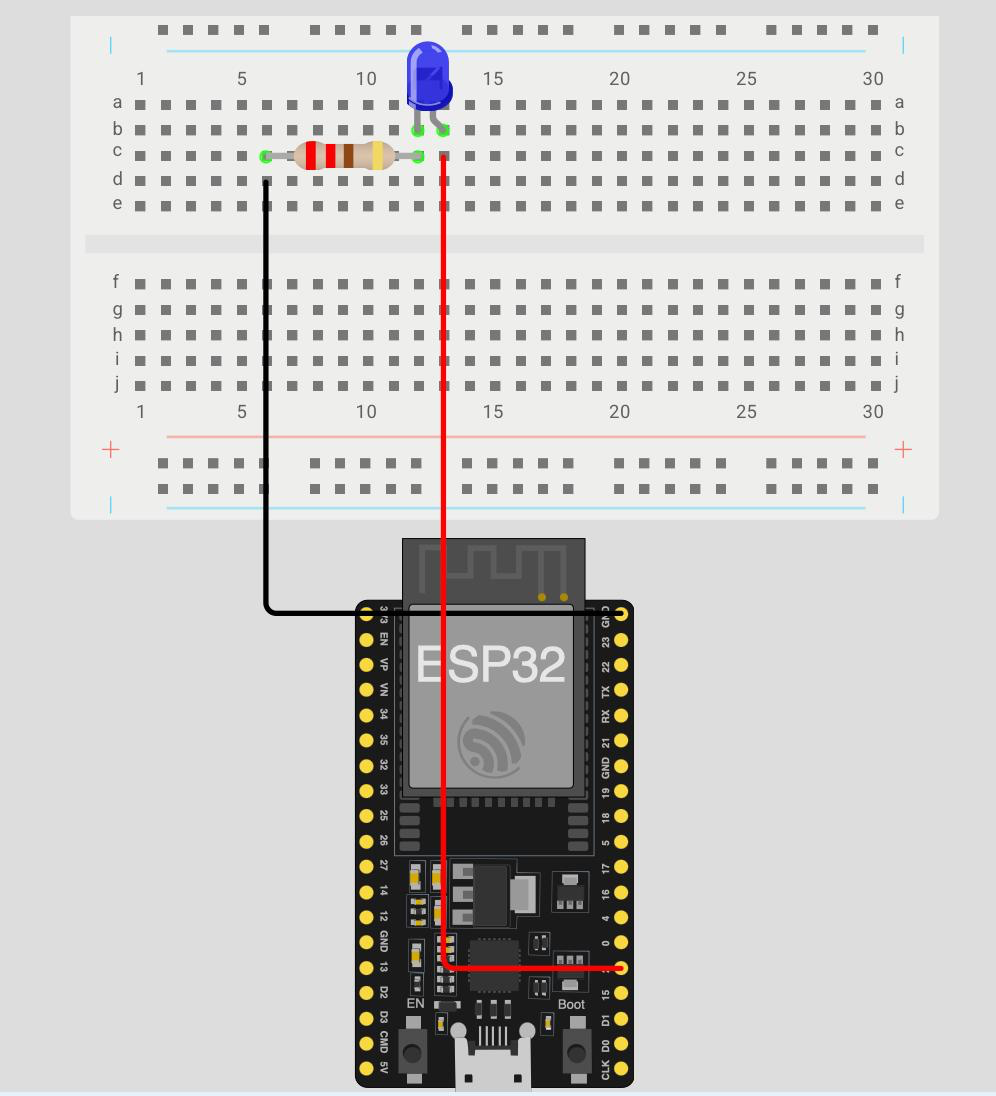
Step 2. Writing Code for ESP32
Copy the following code and paste it in Arduino IDE
void setup() {
  pinMode(2, OUTPUT); // GPIO 2
}

void loop() {
  digitalWrite(2, HIGH);
  delay(500);
  digitalWrite(2, LOW);
  delay(500);
}
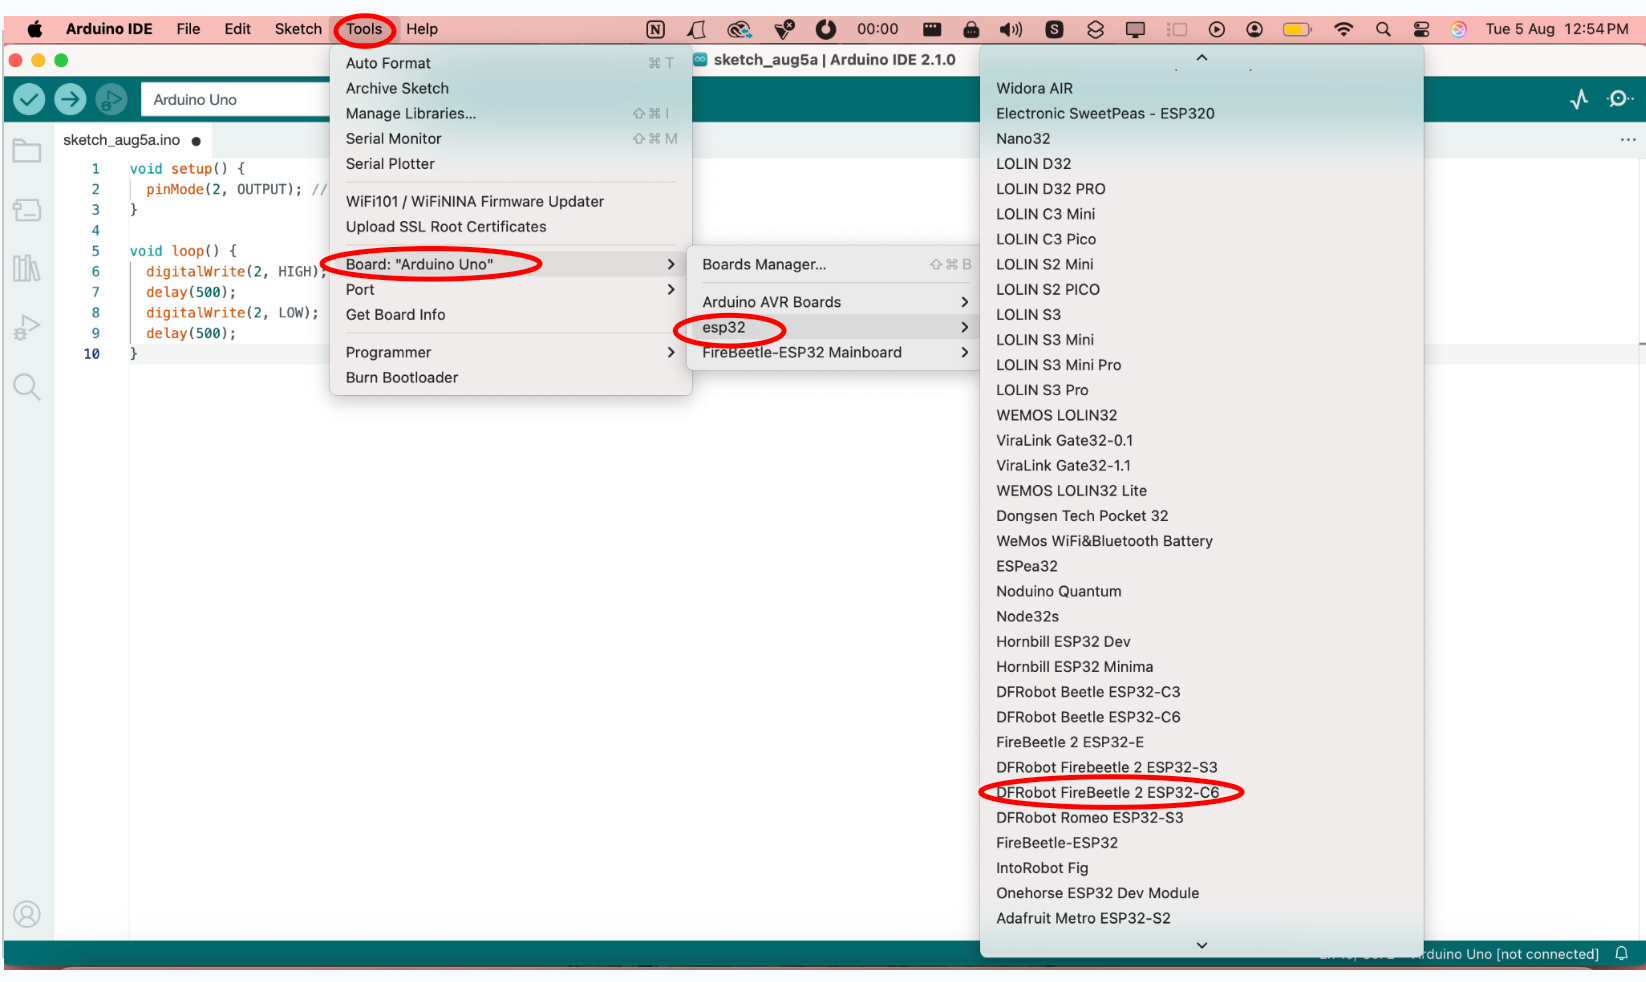
Step 3. Uploading Code to ESP32
In Tools Menu – Select Board > Boards Manager (select esp32) > DF Robot Firebeetle 2 ESP32-C6
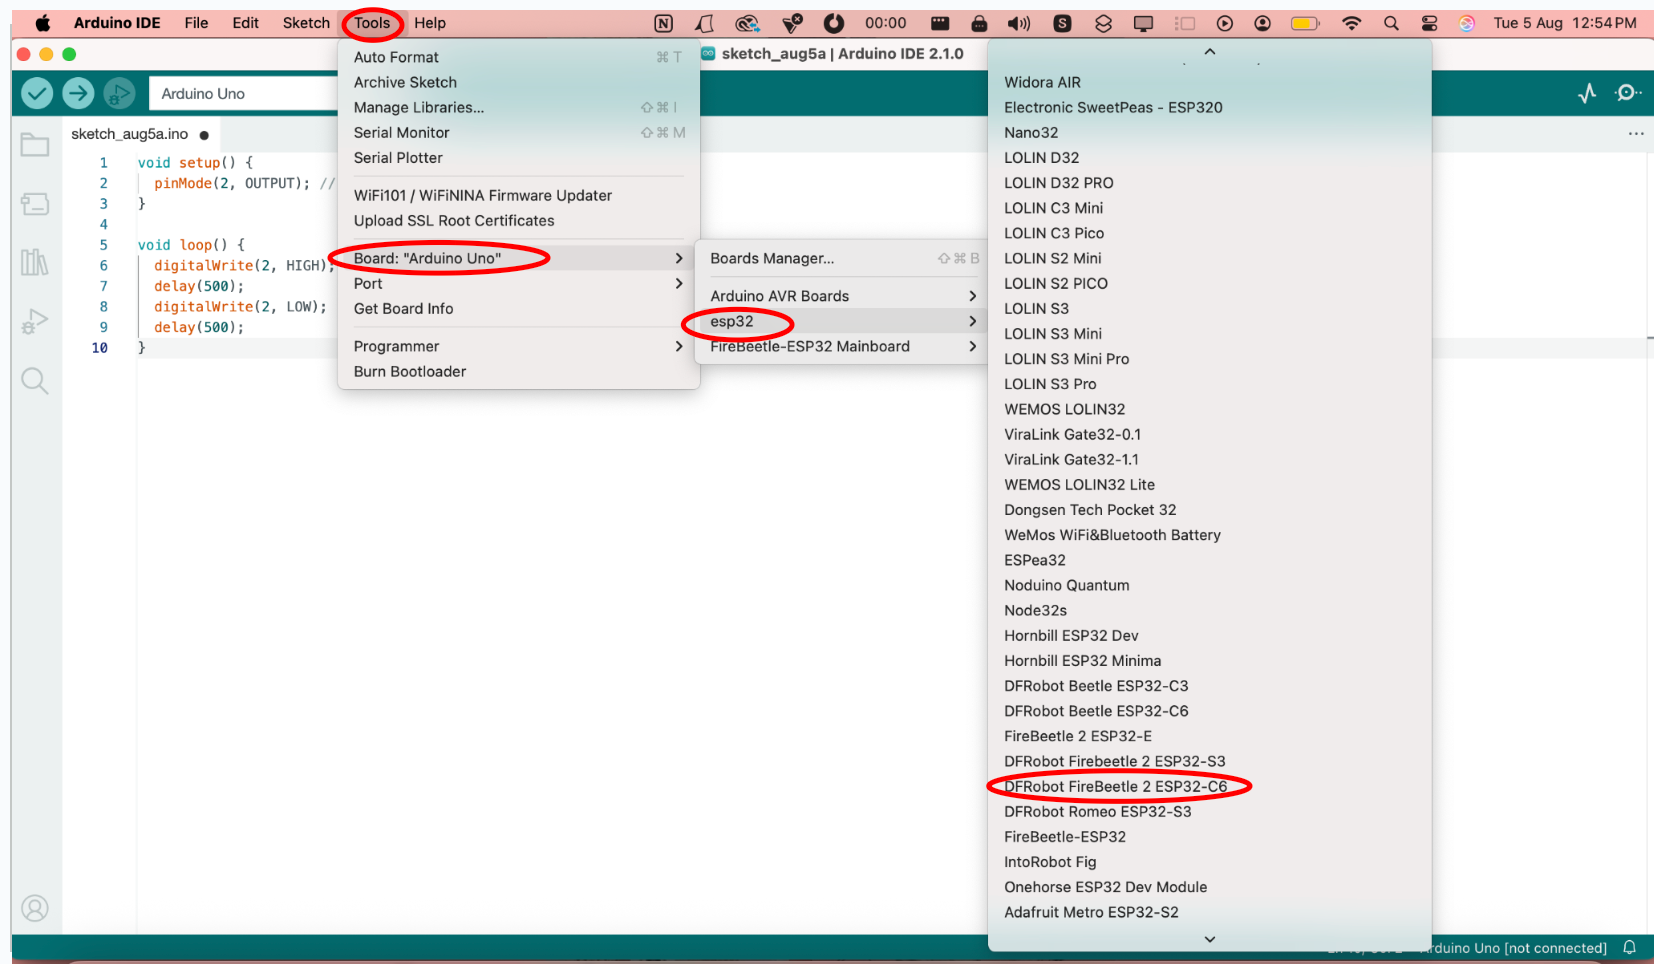

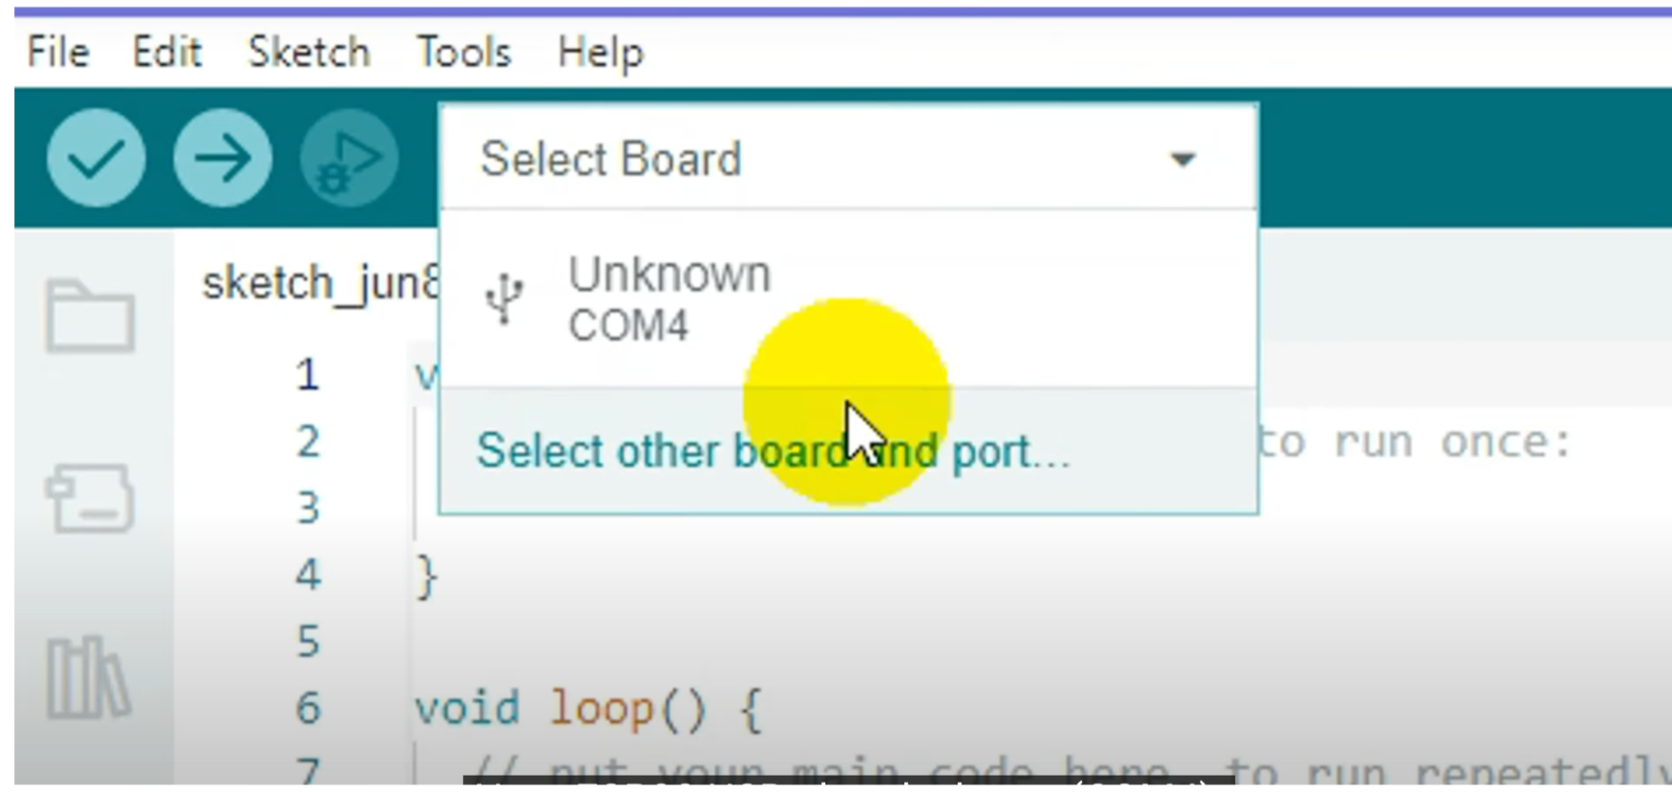
Select the suitable COM Port in the Select Board Option for DF Robot Firebeetle 2 ESP32-C6.
Press the Upload button in the Arduino IDE. Wait a few seconds while the code compiles and uploads to your board. LED should now blink at a delay of 500 milliseconds
Controlling DC Motor with L298N
Materials Required
- Firebeetle 2 ESP32-C6
- L298N Motor Driver
- BO Motor
- Jumper Wires
- Battery Pack of 3 AAA cells of 3.4V each
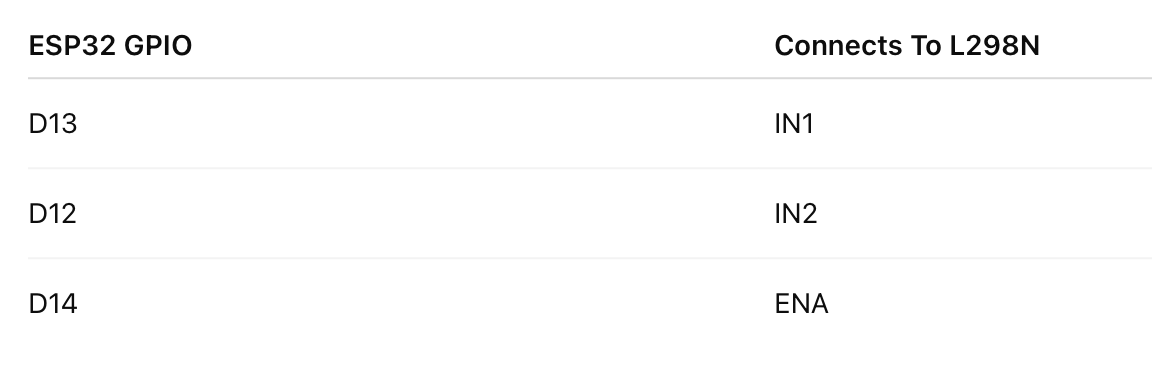
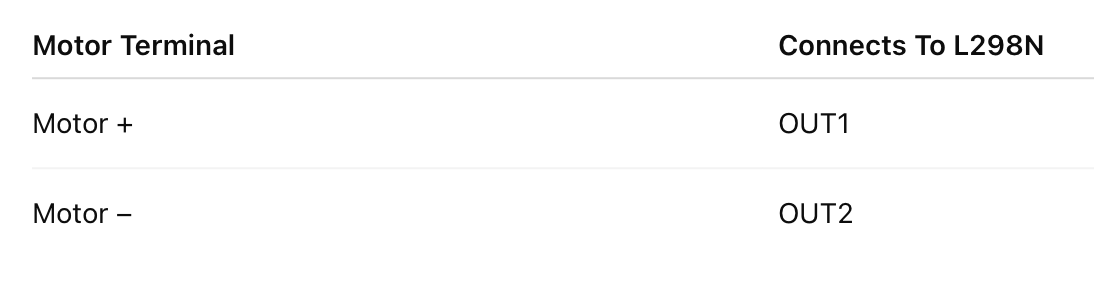
Step 1. Making Wired Connections
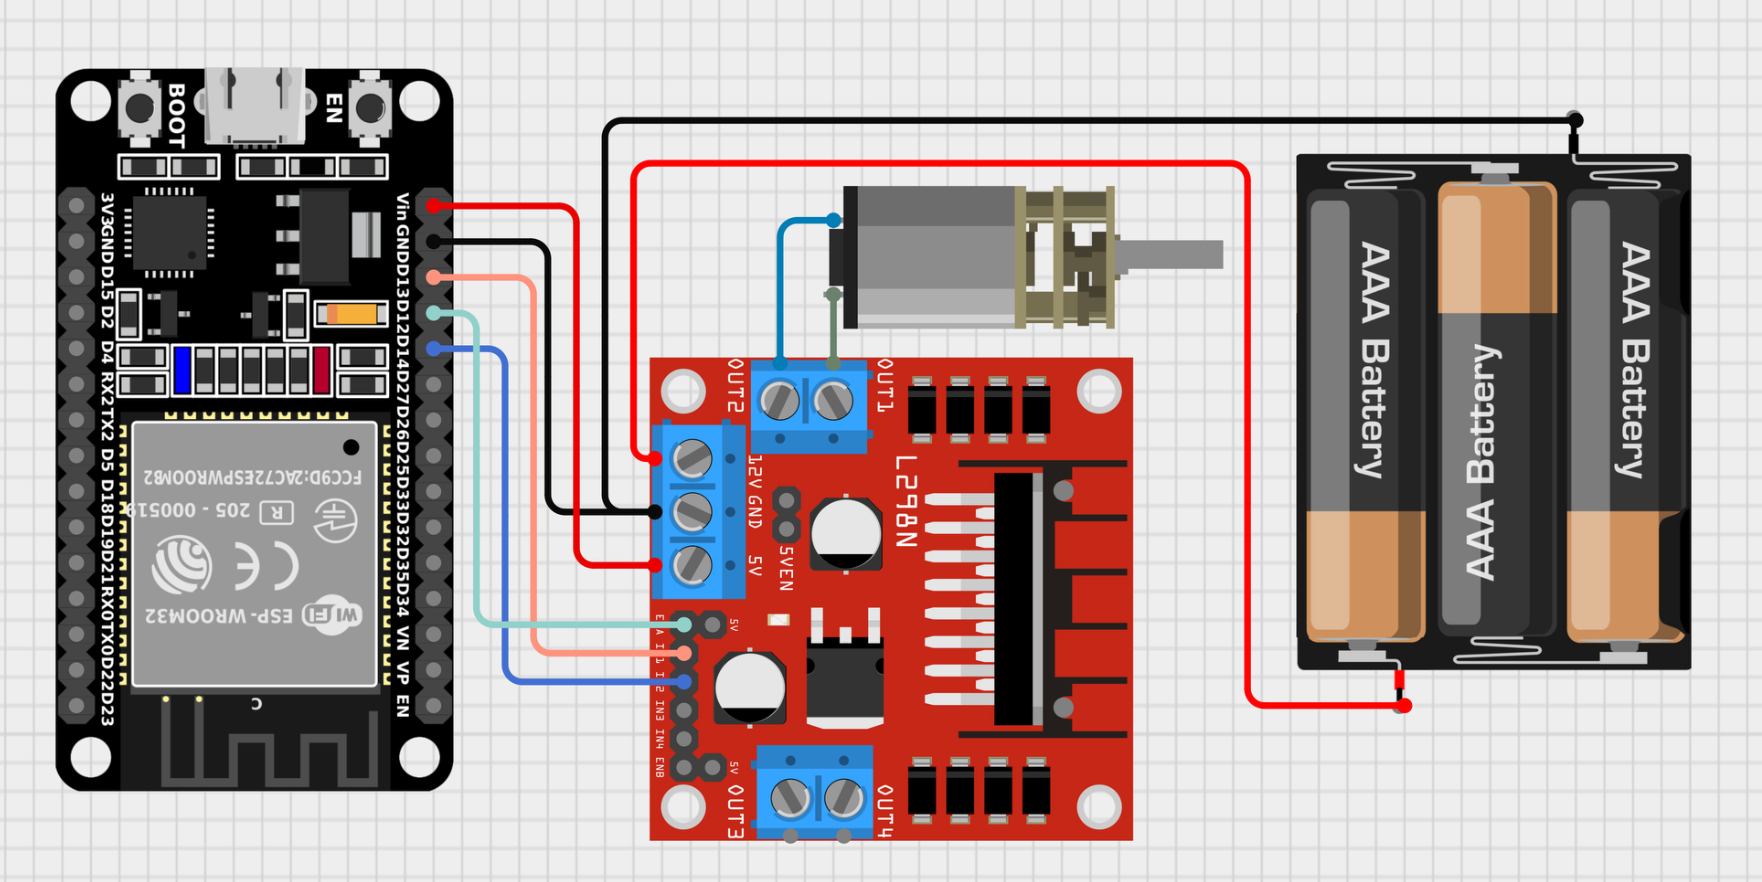
Connections:


Step 2. Writing Code for ESP32
Copy and paste the following code in Arduino IDE
#include<Arduino.h>

#define IN1 13
#define IN2 14
#define EN  12

void setup() {
  pinMode(IN1, OUTPUT);
  pinMode(IN2, OUTPUT);
  pinMode(EN, OUTPUT);
}

void loop() {
  // Drive motor forward
  digitalWrite(IN1, HIGH);
  digitalWrite(IN2, LOW);
  digitalWrite(EN, HIGH);
  delay(2000);

  // Drive motor backward
  digitalWrite(IN1, LOW);
  digitalWrite(IN2, HIGH);
  digitalWrite(EN, HIGH);
  delay(2000);

  // Stop motor
  digitalWrite(EN, LOW);
}
Step 3. Uploading code to Arduino IDE
In Tools Menu – Select Board > Boards Manager (select esp32) > DF Robot Firebeetle 2 ESP32-C6
Select the suitable COM Port in the Select Board Option for DF Robot Firebeetle 2 ESP32-C6
Press the Upload button in the Arduino IDE. Wait a few seconds while the code compiles and uploads to your board. motor should now rotate clockwise for 2000 milliseconds and anticlockwise for next 2000 milliseconds.