20261ROB7: Underwater Vehicle
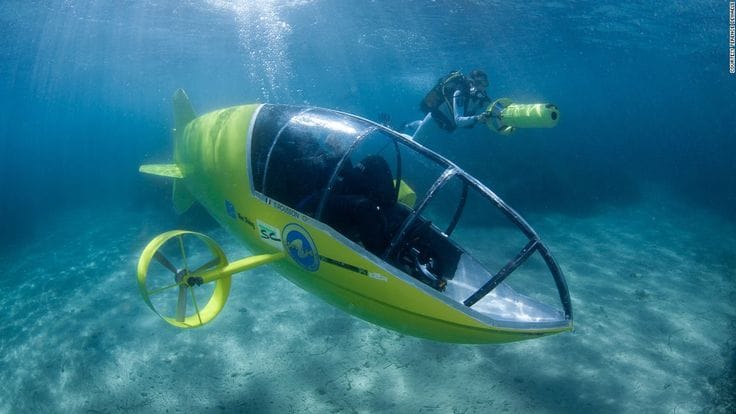
Brief Description & Functionality
An underwater vehicle is a robotic platform designed to operate beneath the water's surface for observation, inspection, exploration, data collection, and object manipulation. The objective of this project is to design and fabricate an underwater vehicle using readily available materials, such as PVC pipes, DC motors, propellers, wires, switches, and flotation materials.
The vehicle will be connected to a controller outside the water using electrical wires called a tether. The operator can control different motors using switches to change the direction of movement.
The vehicle should be able to:
• Move forward and backwards • Turn left and right • Move upward and downward • Remain reasonably stable underwater • Operate in a water tank or swimming pool • Demonstrate basic underwater vehicle principles
The project is intended primarily to help students understand buoyancy, stability, thrust, waterproofing, basic fabrication, and electrical control.
Applications
Small remotely operated underwater vehicles are commonly used for:
• Underwater inspection • Inspection of tanks and pipelines • Search and observation • Marine research • Checking underwater structures • Educational demonstrations • Environmental monitoring
The proposed student project will demonstrate only the basic movement and control principles of these systems.
Working
The underwater ROV operates by combining buoyancy, ballast, propulsion, and tethered control.
Frame and Structure
• A lightweight frame is fabricated using PVC pipe, acrylic/HDPE sheet, aluminium profiles, or a combination of these materials.
• Thrusters, buoyancy foam, ballast weights, the electronics enclosure, and the camera are mounted on the frame.
• The frame should protect the propellers while allowing sufficient water flow around the thrusters.
The frame should preferably be small enough for testing inside a laboratory water tank.
Buoyancy and Ballast
When an object is placed in water, an upward buoyancy force acts on it. Foam, sealed plastic bottles, or sealed PVC pipes can be used to provide buoyancy. Small metal weights can be attached to the bottom as ballast.
The amounts of foam and ballast should be experimentally adjusted to bring the vehicle close to neutral buoyancy. This means that the vehicle should neither sink rapidly nor rise rapidly when the motors are switched off.
Propulsion System
The vehicle can use three small DC motors with propellers.
• Motor 1 – Left horizontal thruster • Motor 2 – Right horizontal thruster • Motor 3 – Vertical thruster
The two horizontal motors provide forward, backwards, and turning movement. Running both horizontal motors in the same direction moves the vehicle forward or backwards. Running only one motor, or running the motors differently, allows the vehicle to turn. The vertical motor provides upward and downward movement.
Control System
A simple wired control box will be used instead of a complicated wireless or autonomous control system. The control box can contain switches for: • Forward • Backwards • Left • Right • Up • Down. The switches control the polarity and operation of the DC motors.
Tether
A bundle of electrical wires connects the underwater vehicle with the controller. The tether: • Supplies electrical power to the motors • Transfers control commands through the switches • Helps retrieve the vehicle if required. The tether should be lightweight so that it does not significantly restrict vehicle movement.
Waterproofing
Motors and electrical joints exposed to water must be properly protected. Waterproofing can be achieved using: • Epoxy adhesive • Silicone sealant • Heat-shrink tubing • Waterproof electrical connectors • Suitable motor housings. All waterproofing should be tested before the complete vehicle is operated underwater.
Power Supply
A low-voltage DC power source can be used to operate the vehicle. For student safety, the project should preferably operate at approximately 6–12 V DC. The battery or DC power supply should remain outside the water and supply power through the tether.
Tools and Equipment Required
• Hacksaw / PVC pipe cutter • Hand drill or drilling machine • Screwdrivers • Pliers • Wire cutter and stripper • Soldering iron • Multimeter • Hot glue gun • PVC adhesive • Silicone sealant/epoxy • Measuring scale • Basic hand tools
Main Components Required
• PVC pipes and fittings • Small DC motors or underwater thrusters • Propellers • Electrical wire for the tether • DPDT switches • Control box • 6–12 V battery or DC power supply • Foam or other flotation material • Ballast weights • Silicone, epoxy, or other waterproofing materials • Connectors, screws, and miscellaneous hardware
Safety Considerations
• Do not use exposed mains AC electrical connections near the water tank or pool. • Prefer battery power or an appropriately isolated low-voltage DC supply. • Use a fuse and an accessible emergency stop. • Keep hands, clothing, and cables away from rotating propellers. • Install propeller guards wherever practical. • Perform all electrical tests in dry conditions before immersion. • Leak-test the waterproof enclosure before installing sensitive electronics. • Provide strain relief for the tether so that cable loads are not transferred directly to waterproof penetrators. • The first underwater test should be performed in shallow, clear, still water with the ROV easily retrievable. • Battery charging must be performed outside the water-test area using the correct charger and battery-safety procedure.
Market Survey / Benchmark Systems
SeaPerch Educational ROV
SeaPerch is an educational underwater robotics platform designed around a low-cost tethered ROV. It is a useful benchmark for understanding basic frame design, waterproofing, propulsion, buoyancy, electrical control, and student-level manufacturing.
Resource: https://seaperch.org/
Build resources: https://seaperch.org/resources/library/
Blue Robotics BlueROV2
BlueROV2 is a modular commercial/research ROV using multiple thrusters, a watertight electronics enclosure, tethered control, camera, lights, and open-source control software. Its architecture is a useful reference for advanced versions of this project.
Product overview: https://bluerobotics.com/store/rov/bluerov2/
Assembly guide: https://bluerobotics.com/learn/bluerov2-assembly/
CHASING DORY
CHASING DORY is a compact consumer underwater drone using multiple thrusters, a tethered surface buoy, camera, lighting, and depth-control features. It is a useful benchmark for compact packaging and user-friendly underwater operation.
Product overview: https://www.chasing.com/en/chasing-dory-overview.html
Useful Resources
1. SeaPerch Resource Library
Build manuals, structural assembly, mechanical-system lessons, and educational resources. https://seaperch.org/resources/library/
2. MIT Sea Grant – Basic SeaPerch Build Guide
Practical educational guide for building a simple underwater ROV. https://seagrant.mit.edu/basic-seaperch-build-guide/
3. ArduPilot Sub – Introduction
Open-source control platform for remotely operated and autonomous underwater vehicles. https://ardupilot.org/sub/docs/introduction.html
4. ArduPilot Sub-Frame Configurations
Examples of 3-, 4-, 5-, 6-, and 8-thruster underwater vehicle arrangements. https://ardupilot.org/sub/docs/sub-frames.html
5. Blue Robotics – BlueROV2 Assembly Guide
Useful reference for thruster arrangement, watertight enclosures, tethering, and modular ROV construction. https://bluerobotics.com/learn/bluerov2-assembly/
6. Blue Robotics – Technical Reference
Reference information for underwater frames, enclosures, sensors, thrusters, and related components. https://bluerobotics.com/learn/technical-reference/