20251GTY2: Skeeball Game
Brief Description & Functionality:
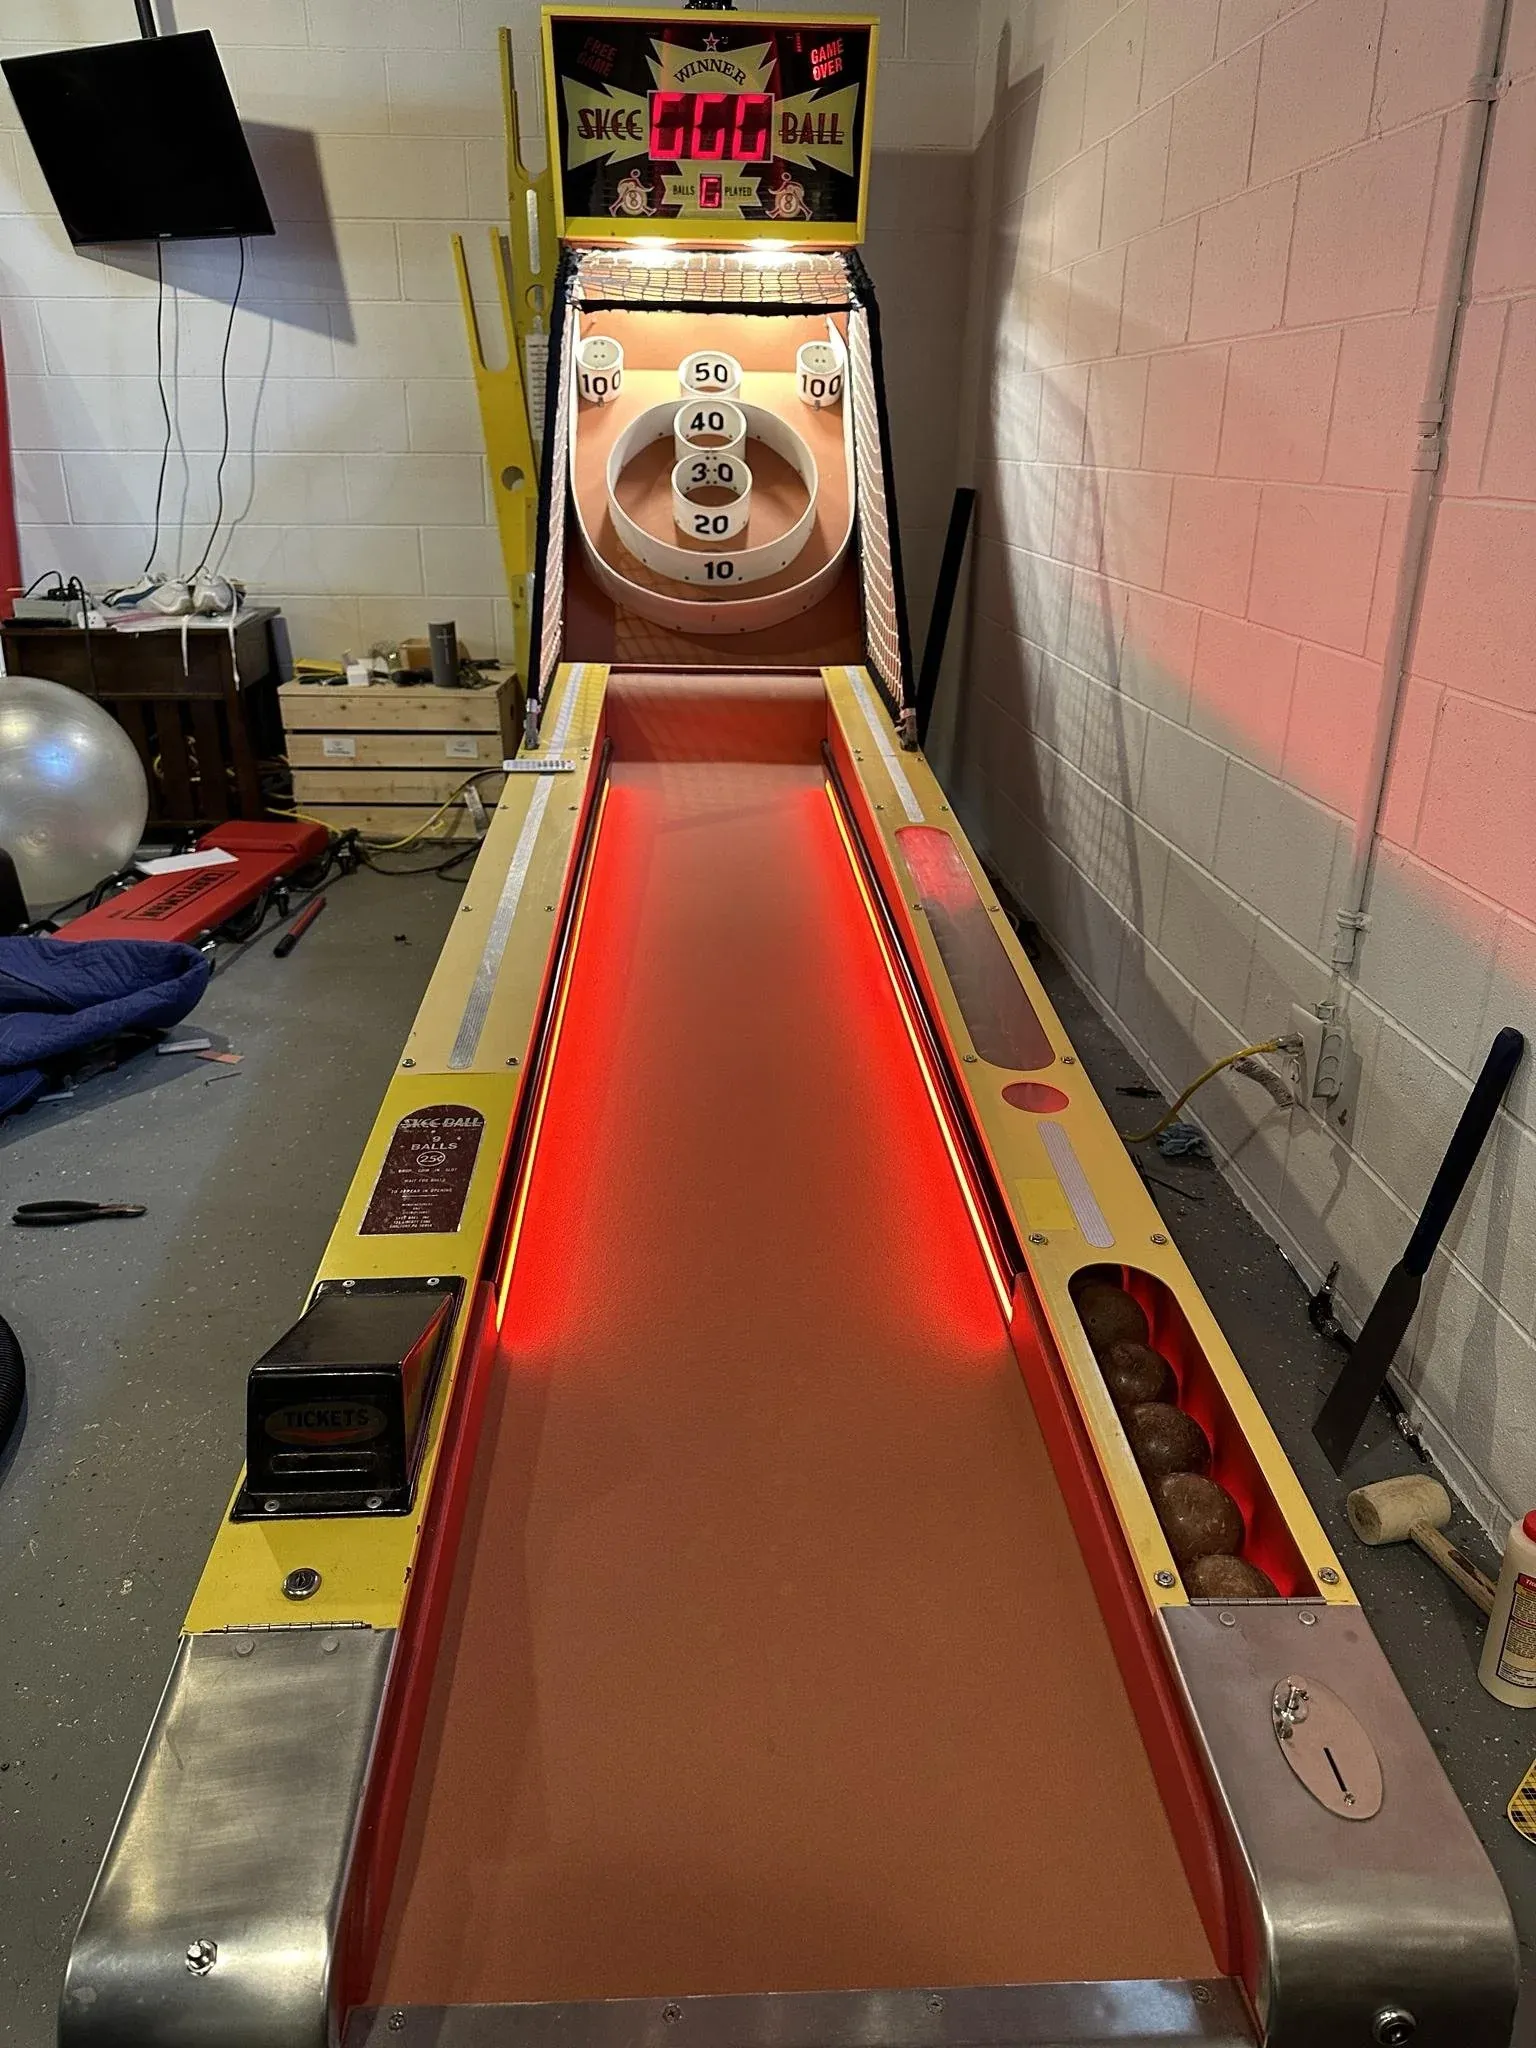
A Smart Skeeball Game is a modernized version of the classic arcade game, integrating electronics for features such as automatic scoring, digital displays, and interactive feedback. The core principle remains the same: players roll balls up an inclined alley, aiming to land them in holes with varying point values. Smart variants use sensors and microcontrollers to enhance the gameplay experience.
- Arcade-style fun: Players roll balls up a ramp into target holes with different scores.
- Automatic electronic scoring: Infrared sensors or pressure switches detect which hole the ball lands in, updating scores automatically.
- Digital display: Scores and possibly timers are displayed using seven-segment or LED matrix displays.
- Audio-visual feedback: Sound effects and lights may signal high scores or achievements.
- Ball return mechanism: Chutes or channels route balls back to the player for fast-paced play.
Working Principle
- The player rolls a ball up an inclined alley.
- The ball flies over a small jump (“ball hop”) and aims for a set of holes, each with an assigned point value.
- Sensors detect the successful landing of a ball in a particular hole.
- A microcontroller (e.g., Arduino, ESP32) calculates and displays the score, potentially adding time limits or bonuses.
- Balls are returned through dedicated channels for quick replays.
Typical features of a “smart” system include automatic scoring, digital displays, and sound/light effects—all enhancing engagement and reducing manual effort.
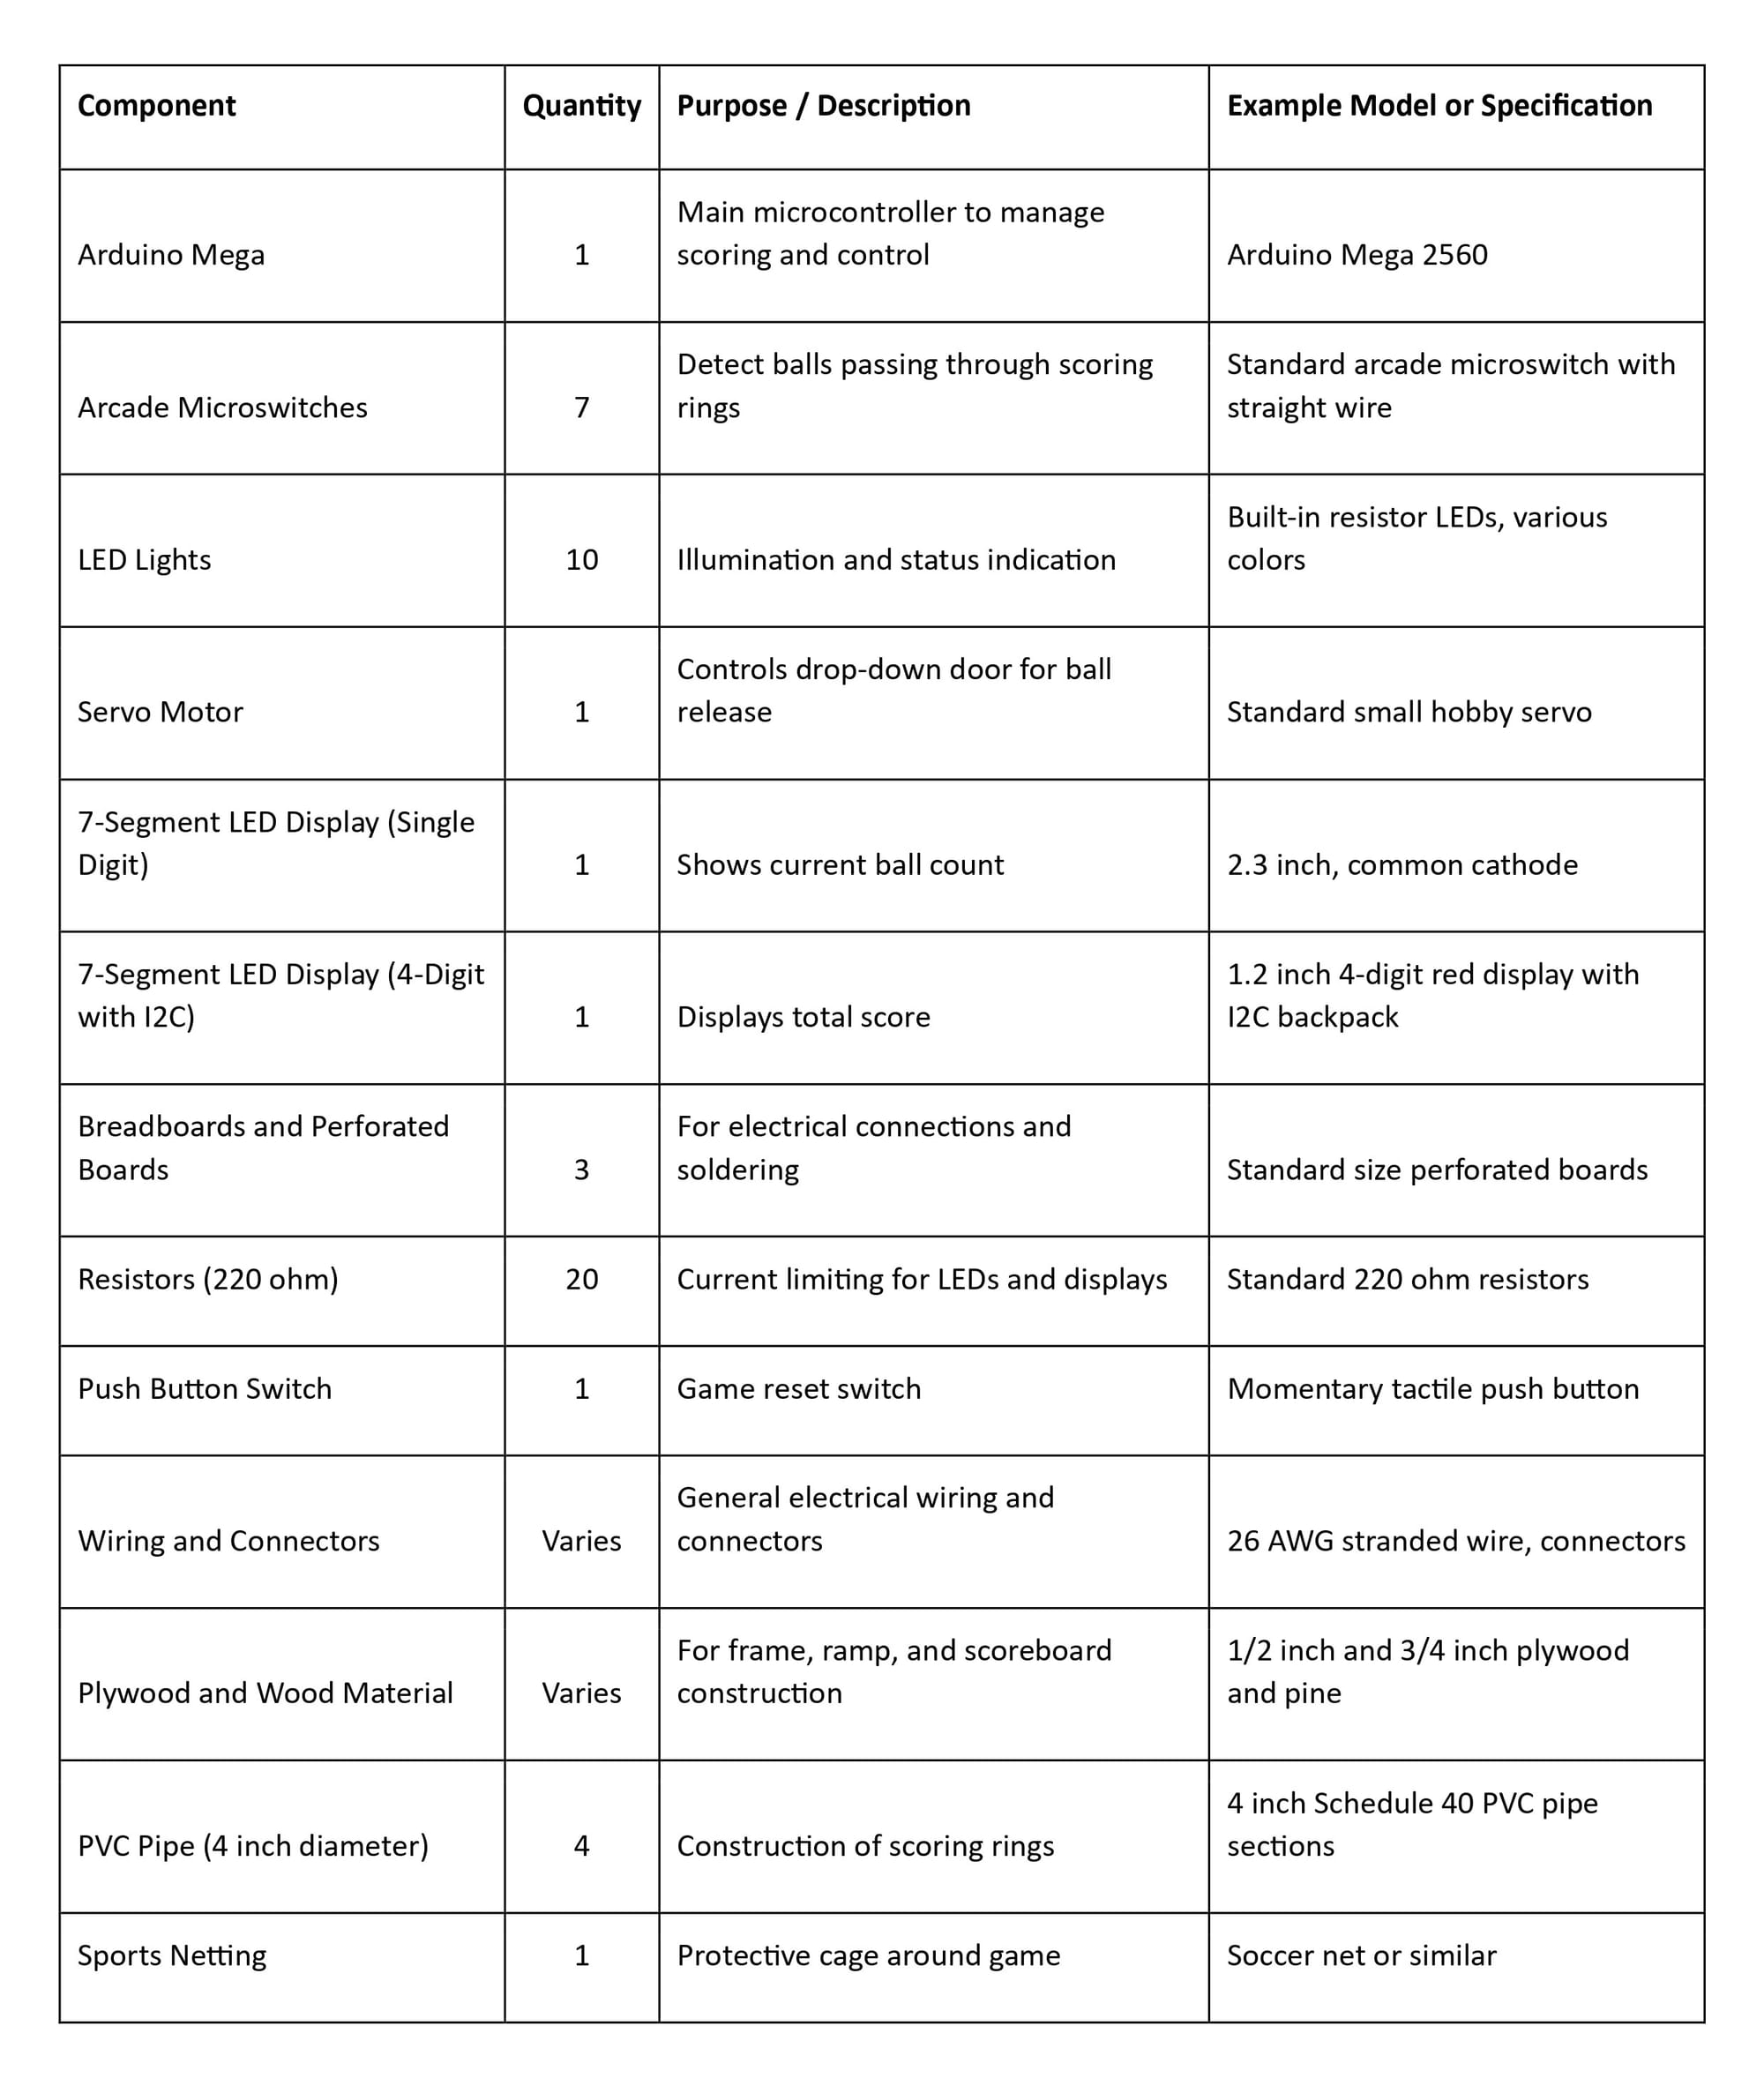
Component and Description
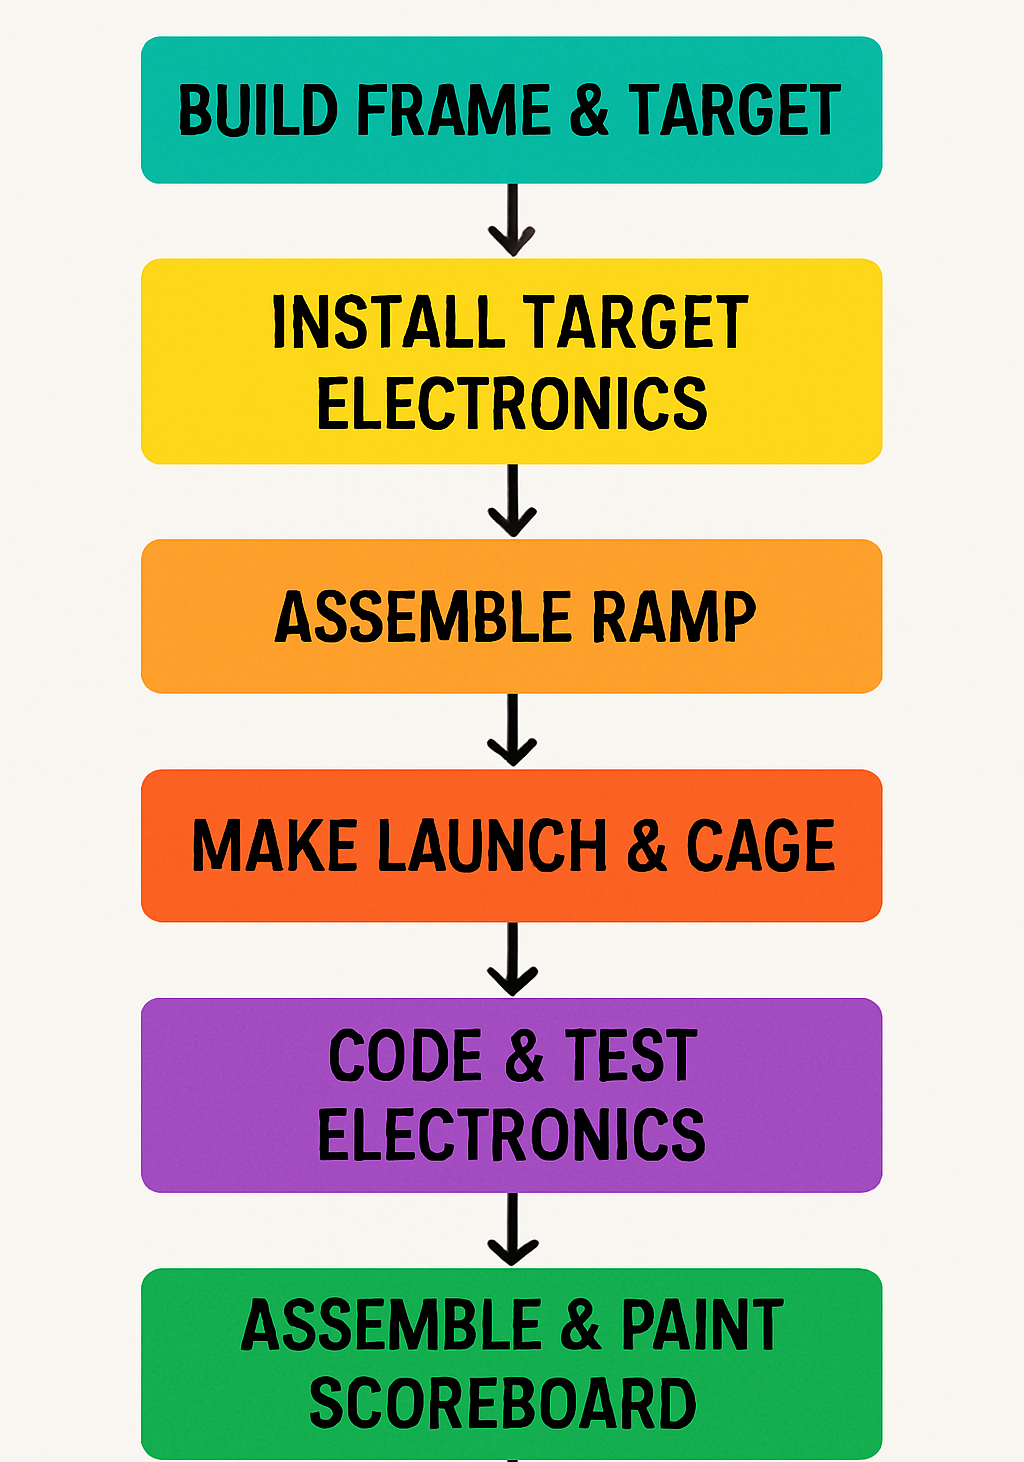
Steps to Fabricate
- Build the Game Frame and Target Board:
Construct a sturdy cabinet frame using plywood and wooden studs sized appropriately for the game.
Create the target board by cutting holes for the scoring rings and lining these holes with pipe material to form the rings securely. - Install Target Board Electronics:
Attach microswitches beneath each scoring ring using custom brackets to ensure the falling balls reliably trigger the switches.
Mount colored LEDs around the scoring holes to illuminate and color-code different scoring areas, wiring them neatly for connection to the scoreboard. - Assemble and Install the Ramp:
Build a sloped ramp from wood with side supports, designed to guide the balls smoothly into a holding area.
Integrate a servo-controlled drop-down door mechanism to release the set number of game balls when a new game begins. - Construct the Ball Launch and Protective Cage:
Fabricate a solid ball launching mechanism from layered lumber, shaped and smoothed for consistent ball release.
Build a protective enclosure around the playing area using wood framing and sports netting to contain the balls safely. - Develop Bench-top Electronics and Code:
Set up the control electronics on a test bench, verifying switch inputs and LED outputs.
Program the microcontroller to manage scoring logic, display updates, ball counting, and servo operations. - Assemble and Paint the Scoreboard:
Construct a wooden enclosure for mounting electronic components like LED indicators and multi-digit displays.
Design, paint, and apply a decorative overlay to the scoreboard to align with the electronic indicators and provide visual appeal. - Final Wiring and Power Integration:
Connect all sensors, LEDs, displays, and servo motors to the microcontroller within the scoreboard enclosure.
Install power supplies and switches to safely provide the required voltages for the game electronics.
Skills Required
- Woodworking or fabrication
- CAD Design
- PCB/Electronic Design
- Microcontroller Programming
- Sheet Cutting/Bending
- Soldering & Electronic assembly
- Testing & Troubleshooting
- Circuit Simulation
- Designing audio/visual feedback
Useful Resources
- Automatic Scoring Skee-Ball Build Guides
- Instructables: Automatic Scoring for a Small Skee-Ball Game
This is a complete guide detailing electronics, code, switches, LEDs, and scoreboard construction—all with step descriptions and photos. - Arduino Forum: Skee-Ball Scoring Hardware and Program
Community discussion, example code, and troubleshooting for Arduino-based Skee-Ball scoring systems. - Hackaday Skee-Ball Projects
Examples of homebuilt Skee-Ball machines using microcontrollers, arcade switches, and both mechanical and optical sensors.
- Instructables: Automatic Scoring for a Small Skee-Ball Game
- Key Tutorials for Electronics & Programming
- Servo Motor Control with Arduino (HowToMechatronics)
Step-by-step explanation and code for using servo motors (e.g., for the ball release door), with and without the Servo library. - Wiring and Using Arcade Microswitches
Clear instructions and diagrams for connecting arcade switches to your microcontroller and incorporating LEDs. - Using a 4-Digit 7-Segment Display with Arduino
Practical breadboarding and wiring, with code for multi-digit score displays. - I2C-Controlled 7-Segment Display
Implementing score displays that require fewer pins, matching the Adafruit I2C backpack display used in many builds. - YouTube: How To Use 7 Segment Display With Arduino
Simple, visual tutorial for connecting and programming a 7-segment display using an Arduino.
- Servo Motor Control with Arduino (HowToMechatronics)