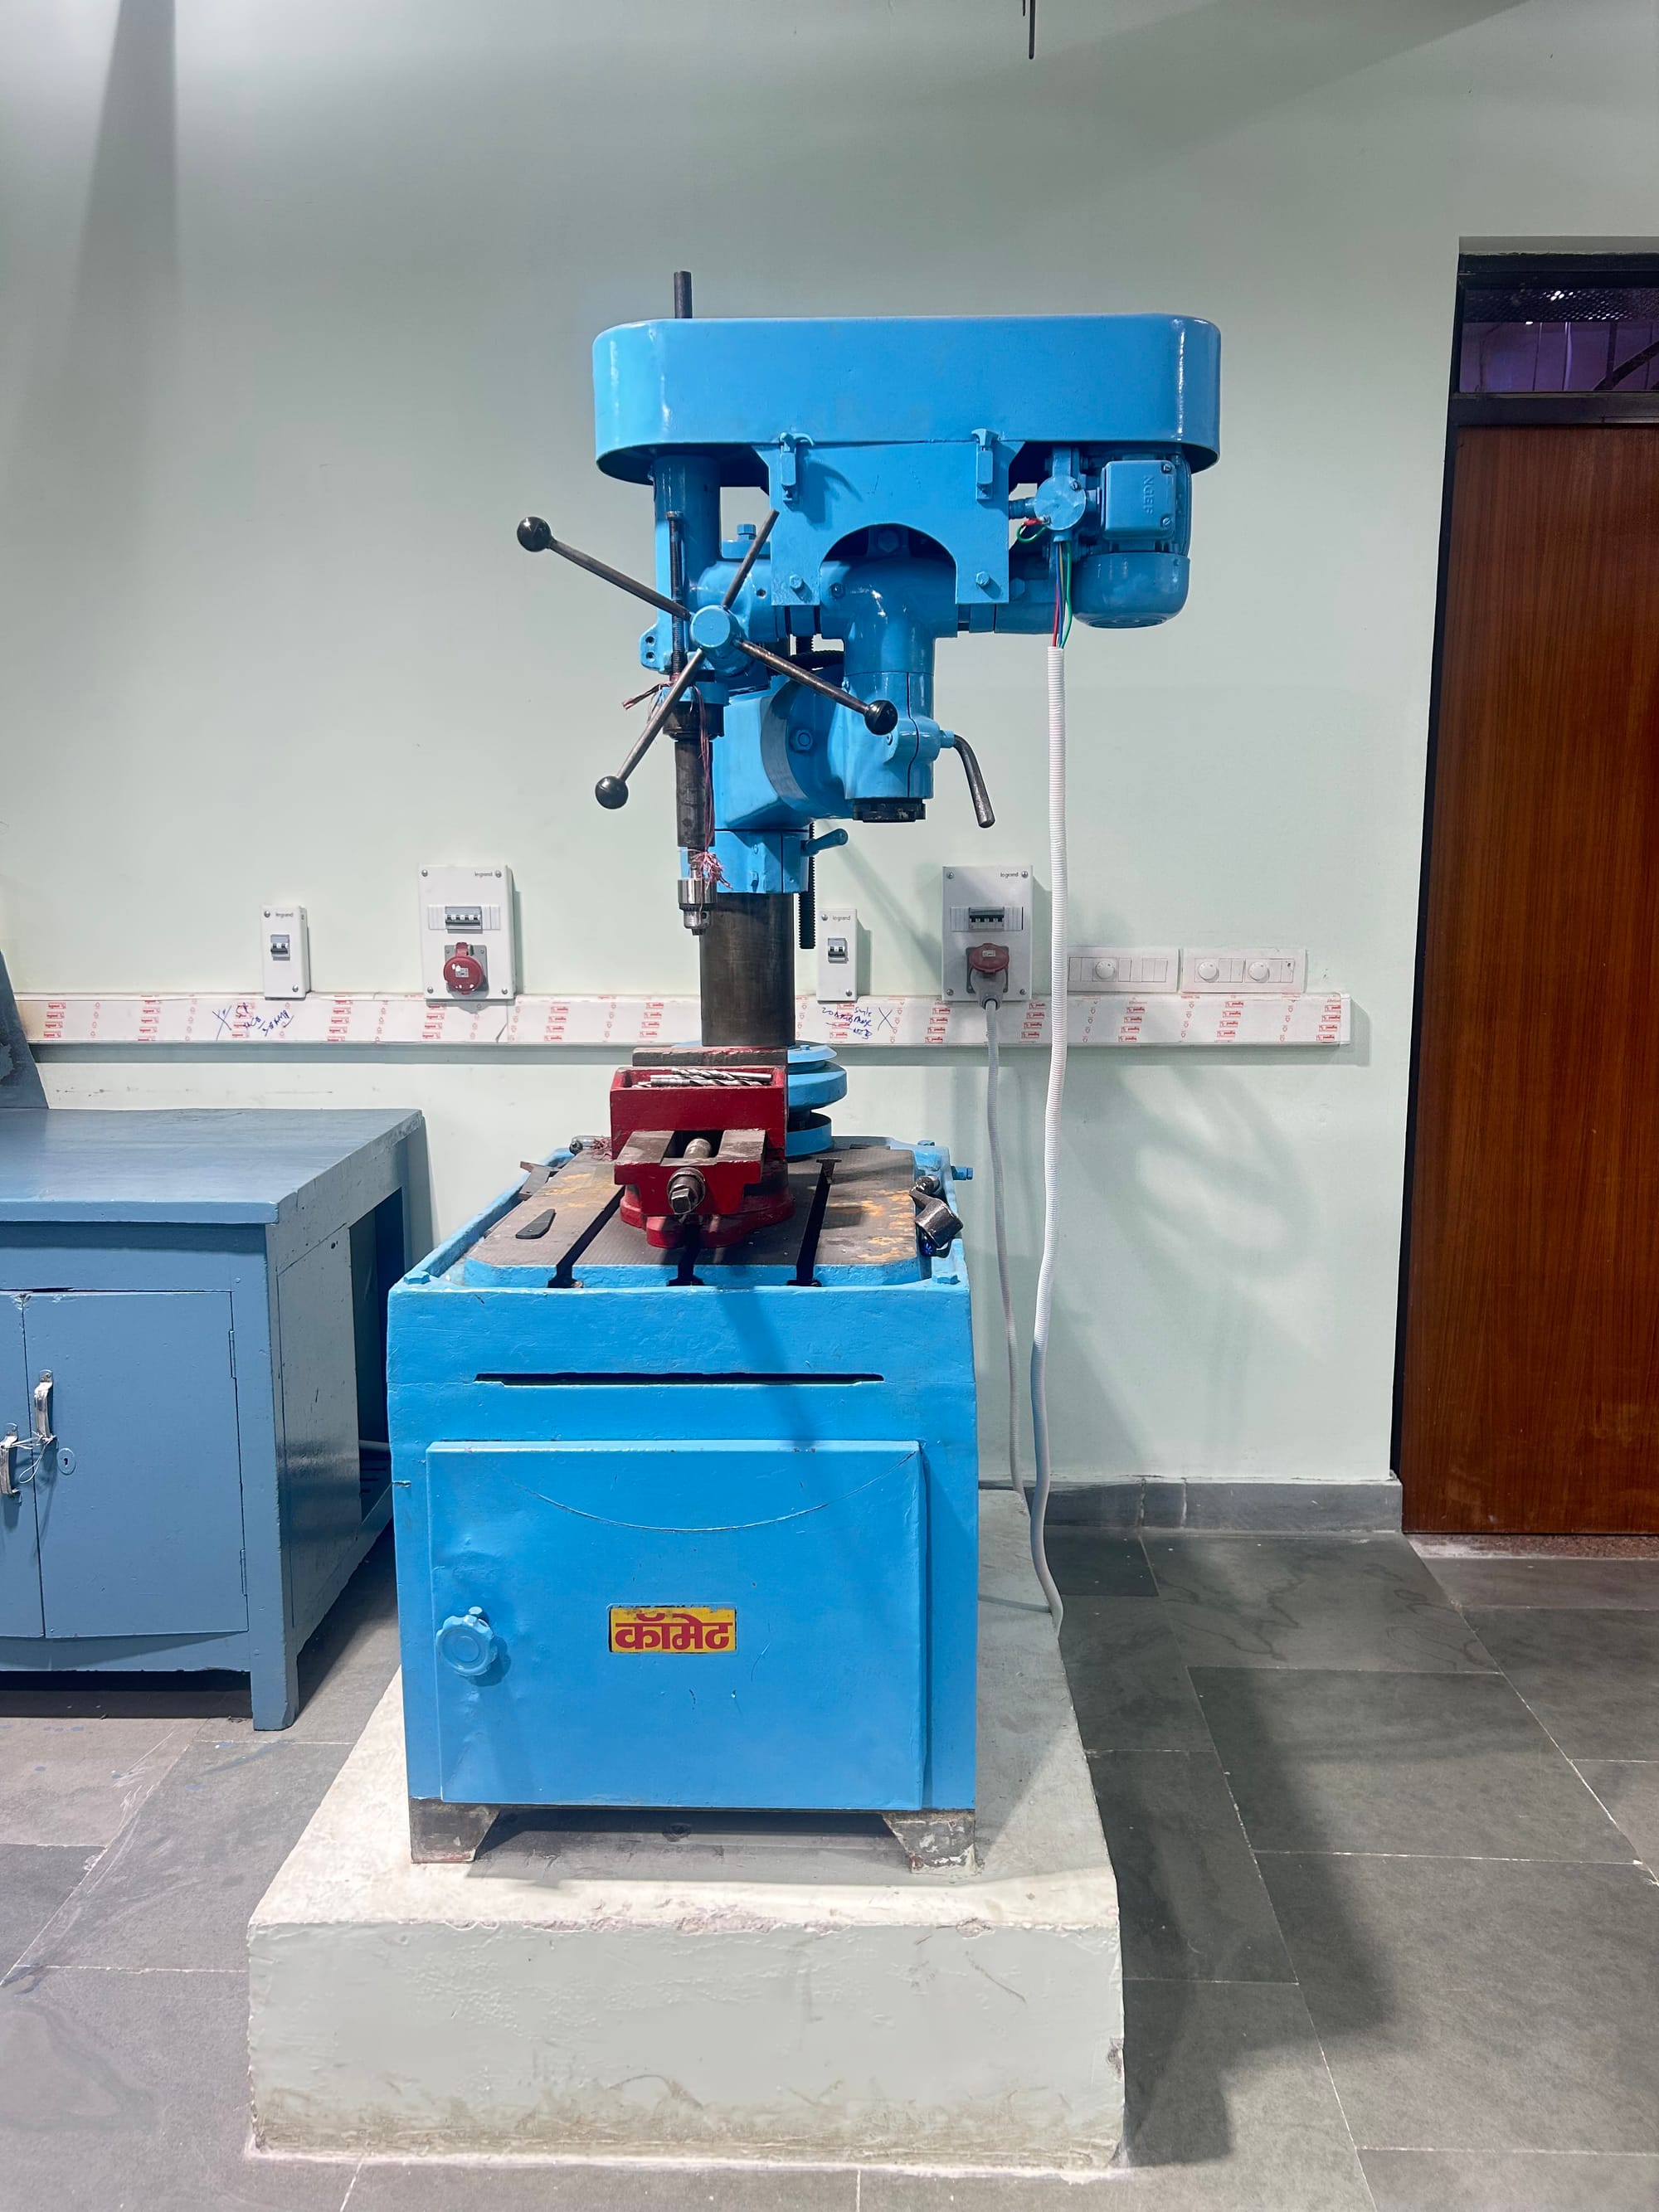
Radial Drill Machine
Drilling is a fundamental machining process used to create cylindrical holes in a solid material, typically using a rotating cutting tool called a drill bit. It is one of the most common and essential operations in manufacturing, workshops, and engineering fabrication. The process involves the relative motion between the rotating drill bit and a stationary or moving workpiece, allowing the tool to cut and remove material to form a hole.
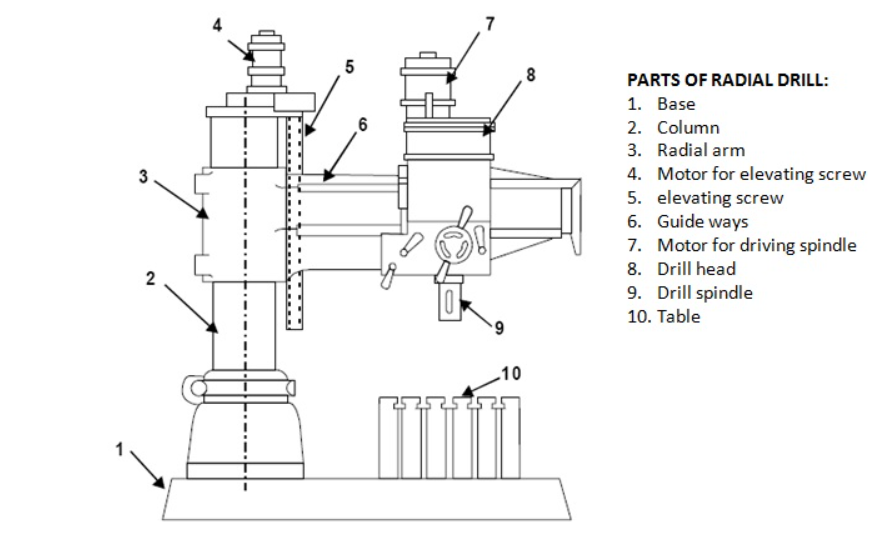
Important Parts of the Radial Drill Machine
- Base
- The bottom-most part of the machine.
- Provides stability and supports the entire machine.
- Often made of cast iron and may have slots to mount the machine on a bench or floor.
2. Column
- A vertical pillar fixed on the base.
- Supports the arm, table, and head.
- Ensures proper alignment and rigidity during drilling.
- Radial arm
- Supports the drill head, allowing it to move along the arm.
- Enables adjustable drilling positions across a wide area.
- Facilitates drilling on large workpieces that cannot be easily shifted.
- Motor for elevating screw
- Provides the power required to rotate the drill bit.
- Usually electric and mounted in or on the headstock.
- Elevating Screws
- Adjust the height of the radial arm or worktable to accommodate different workpiece sizes.
- Help in accurate positioning of the drill bit with respect to the job.
- Guide ways
- Provide a straight and stable path for movement of components like the drill table or radial arm.
- Maintain alignment and precision during drilling operations.
- Minimize vibration and deflection, ensuring smooth motion and accurate hole placement.
- Motor for driving spindle
- Powers the spindle rotation at various speeds.
- Delivers torque required for drilling through different materials (e.g., wood, plastic, mild steel, cast iron).
- Drill head
- Converts electrical energy (from the motor) into rotational mechanical energy.
- Transmits power to the spindle and drill bit.
- Drill spindle
- The rotating shaft that holds and drives the drill bit.
- Connected to the motor through pulleys or gears.
- Ensures concentric rotation for accurate drilling.
- Table
- A flat platform attached to the column.
- Used to hold the workpiece using vices or clamps.
Twist Drill
The tool used for drilling is termed a Twist drill. It is most commonly used tool for making holes. It is typically a two-flute cutting tool having two main parts, namely the Body and the Shank.
The twist drills are used for making holes and are generally made of high-speed steel (HSS) or Tungsten Carbide (WC/Co). Both straight and taper shank twist drills are used.

Process Sheet
Step 1: Selection of size of drill bits
Select the correct size drill, put it into the chuck, and lock it finely.
Step 2: Adjustment of speed of machine according to workpiece material
Adjust the speed of the machine to suit the workpiece material.
It is preferred to use high speed and small drills to machine soft materials.
It is preferred to use low speed and large diameter drills to machine hard materials.
Step 3: Positioning of workpiece material on the machine table
Hold the work firmly in the vice on the machine table and clamp it directly onto the machine table.
Step 4: Marking of hole location
Mark the location of the hole using a centre punch.
Step 5: Switch on the power and application of slight pressure
Switch on the power, locate the punch mark, and apply slight pressure with the feed handle.
Step 6: Increase the pressure through feed handle
Once drilling is commenced at the correct location, apply enough pressure and continue drilling.
When drilling steel, apply cutting oil at the drilling point.
Step 7: Release the pressure slightly
Release the pressure slightly when the drill point pierces the lower surface of the metal. This prevents the drill from catching and damaging the work or drill.
Step 8: Retracing the drill out of the workpiece material
On completion of the drilling, retrace the drill out of the work and switch off the power supply.
Remove the workpiece from the vice and clean it.