Milling on Vertical Milling Machine(VMC)
VMC Booking Time: 3 Hrs
Max CMF Points Earned: 400 Pts.
Facility to Book : MNTR Milling Machine
Vertical Milling Machine
Learn basic introduction about the Vertical Milling Machine (VMC) before performing any operation.
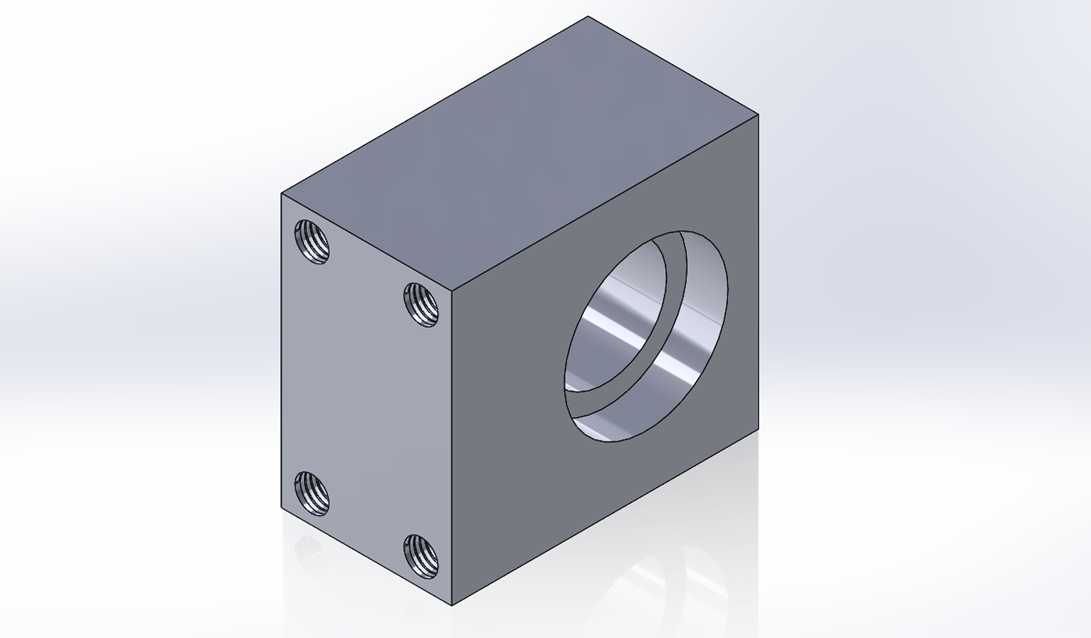
Bearing Housing
The bearing housing is a mechanical structure designed to support and position bearings, which ensure accurate alignment, load distribution and rigid mounting in rotating machinery.
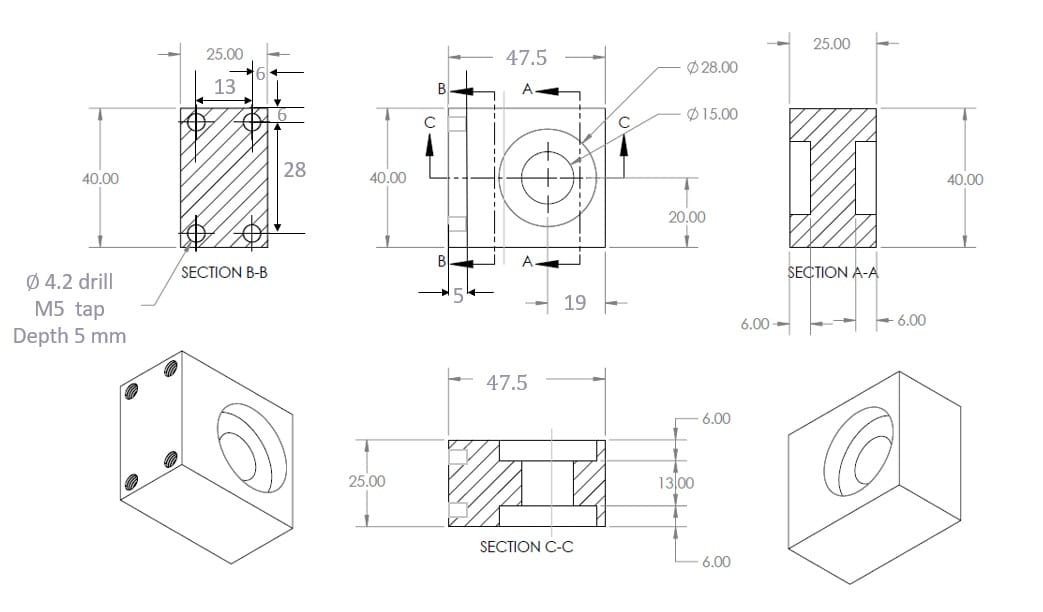
Download Part Drawing
General Safety & Precautions
- Always wear safety goggles and ear protection while operating the VMC.
- Securely clamp the workpiece before beginning any operation.
- Never touch rotating parts or cutting tools while the machine is running.
- Keep the work area clean and free from oil and chips.
- Use appropriate cutting fluid to avoid overheating.
- Check tool alignment and offsets before starting operations.
- Do not leave the machine unattended while in operation.
- Use proper speeds and feeds to prevent tool breakage.
Step-0: Material & Tools Required
- Workpiece: Mild Steel or Aluminum Block (as per project specification)
- Tools Required:
- Face Mill Cutter (dia. 10 mm)
- End Mill Cutter (dia. 10 mm)
- Twist Drills (dia. 4.2 mm, 8 mm, 15 mm, 18 mm)
- M5 Tap
- VMC or Vertical Milling Machine
- Tapping Tools
Step-1: Clamp Workpiece and Set Machine
- Operation: Secure the block on the VMC bed and set up a zero reference
- Tool Required: Face Mill Cutter (dia. 10 mm), End Mill Cutter (dia. 10 mm), Drill Press with 8 mm drill bit, Drill Press with 15 mm drill bit, Drill Press with 4.2 mm drill bit
- Time: 20 minutes
Step-2: Face Milling – Top Surface
- Operation: Perform facing to level the top surface
- Tool Required: Face Mill Cutter (dia. 10 mm)
- Time: 10 minutes
Step-3: End Milling – Side Surfaces
- Operation: Finish the side faces of the block
- Tool Required: End Mill Cutter (dia. 10 mm)
- Time: 20 minutes
Step-4: Face Milling – Bottom Surface
- Operation: Face the underside of the block
- Tool Required: Face Mill Cutter (dia. 10 mm)
- Time: 10 minutes
Step-5: Drill Pilot Hole – dia. 8 mm
- Operation: Drill a pilot hole for larger through holes
- Tool Required: VMC / Drill Press with 8 mm drill bit
- Time: 10 minutes
Step-6: Drill Through Hole – dia. 12 mm
- Operation: Enlarge the hole to 15 mm diameter
- Tool Required: VMC / Drill Press with 15 mm drill bit
- Time: 10 minutes
Step-7: Drill Through Hole – dia. 15 mm
- Operation: Further enlarge the hole to 18 mm diameter
- Tool Required: VMC / Drill Press with 10 mm drill bit
- Time: 10 minutes
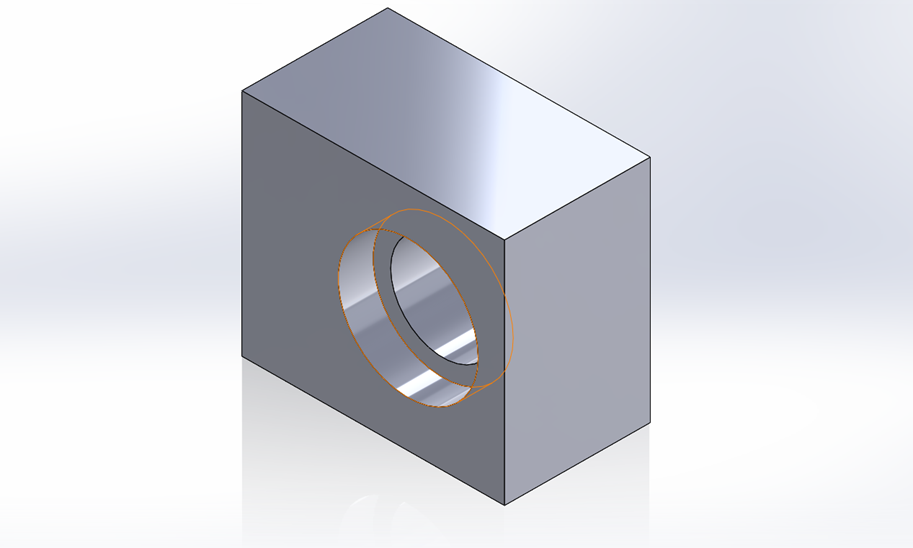
Step-8: End Milling – Counterbore dia. 28 mm
- Operation: Create a counterbore with dia. 28 mm
- Tool Required: End Mill Cutter – dia. 10 mm
- Time: 10 minutes
Step-9: Drill Pilot Hole – dia. 8 mm (Opposite Face)
- Operation: Drill pilot hole on the opposite side
- Tool Required: VMC / Drill Press with 8 mm drill bit
- Time: 10 minutes
Step-10: Drill Through Hole – dia. 12 mm (Opposite Face)
- Operation: Drill final diameter through the block
- Tool Required: VMC / Drill Press with 18 mm drill bit
- Time: 10 minutes
Step-11: End Milling – Counterbore dia. 28 mm (Opposite Face)
- Operation: Create a counterbore on opposite side
- Tool Required: End Mill Cutter – dia. 24 mm
- Time: 10 minutes
Step-12: Drill Tap Holes – dia. 4.2 mm for M5 (4 holes)
- Operation: Drill holes in preparation for internal M5 threading
- Tool Required: VMC / Drill Press with 4.2 mm drill bit
- Time: 10 minutes
Step-13: Tapping – Internal M5 Thread (4 holes)
- Operation: Tap M5 internal thread
- Tool Required: M5 Tap & Tapping Machine
- Time: 10 minutes
Learning outcome:
- Proper use of marking and hand tools
- Workpiece alignment
- How to use VMC?
- Face milling
- End milling
- Drilling and tapping