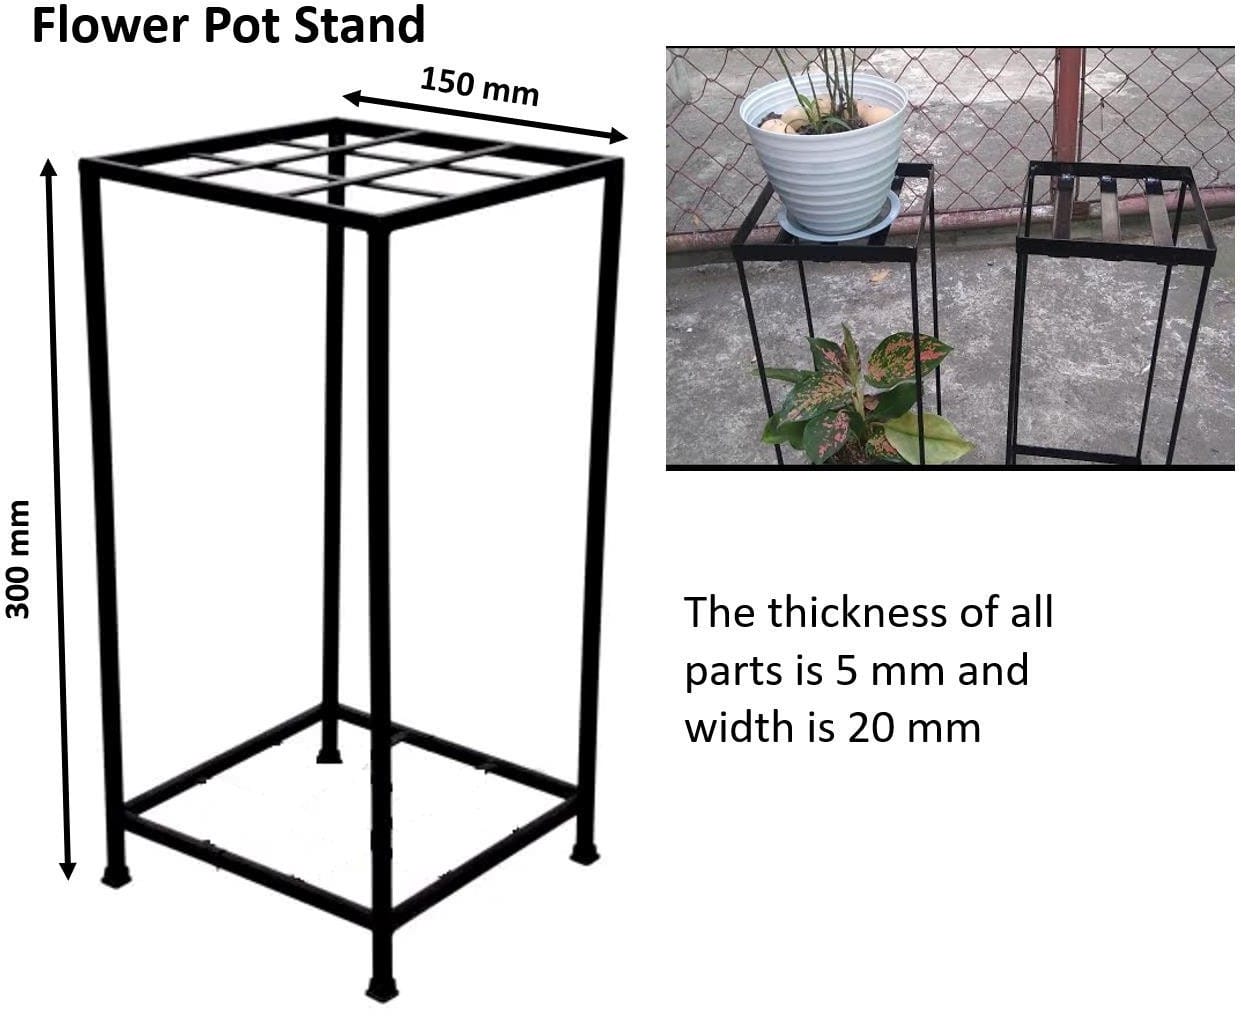
Arc Welding : Flower Pot Stand
Job duration: 3 hours
Credits: 400
Facility to Book: Shielded Metal Arc Welding (Welding Shop)
Step-by-step procedure
1. Measure and Cut Steel Bars
o Measure and cut mild steel square bars (5 mm thick, 20 mm wide) into the following lengths: 300 mm, 150 mm, and 140 mm.
o Use a measuring tape, marker, and angle grinder or cutting machine.
2. Weld the Base Frame
o Weld four 150 mm square bars to form a square base.
o Use a set square and clamps to ensure all corners are exactly 90°.
o Use an arc welding machine, set square, and clamps.
3. Make the Top Frame and Support Bars
o Repeat the previous process to make a top square frame using four bars.
o Weld two horizontal and two vertical bars inside this frame to create support for the pot.
o Use a welding machine, measuring tape, and square.
4. Attach the Legs
o Weld four leg bars (each 300 mm) vertically at the corners of the base frame.
o Use magnetic clamps or jigs to keep the bars upright and stable while welding.
o Use a welding machine and magnetic clamps or jigs.
5. Assemble the Frame
o Place and weld the completed top frame onto the tops of the four leg bars.
o Ensure the frame is parallel to the base and that all legs are properly aligned.
o Use a welding machine, clamps, and measuring scale.
6. Finishing Work
o Grind and smooth all the welds to remove spatter or burrs.
o Apply anti-rust primer followed by black enamel paint for durability and an improved finish.
o Use an angle grinder and sandpaper for smoothing.
Safety Precautions
· Wear appropriate safety glasses, gloves, an apron, and proper boots
· Use ventilation/extraction for fume control
· Handle electrical equipment with care
Learning Outcomes
· Welding Joint Preparation and Assembly
· Surface Finishing and Safety Practices
· Precision Measuring and Material Preparation
· Use of Jigs, Clamps, and Fixtures